How to Setup Windstream with Outlook 365?
If you want to set up your Windstream email account with Microsoft Outlook 365, you’ve come to the right place. In this article, we’ll walk you through the process step-by-step. By the end, you can check your Windstream email from Outlook. Let’s get started!
Setting up Windstream Mail on Outlook 365
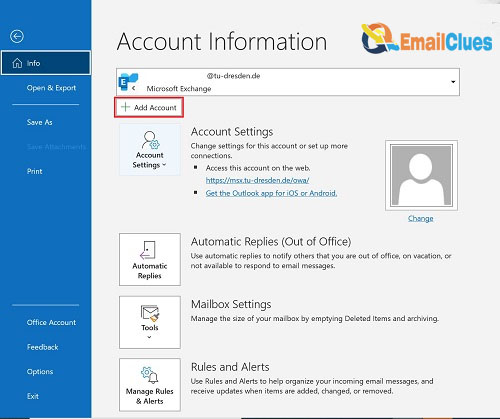
- First, you’ll need to open Outlook and navigate to the File tab. From here, click on Add account.
- You’ll be asked to enter your email address on the next screen. Enter your full Windstream email address (including the @windstream.net part).
- Once you’ve done that, click on the Connect button.
- Outlook will now try to configure your account automatically. If it is successful, you’ll see a screen that says Congratulations! You’re all set up. Click the Done button to finish.
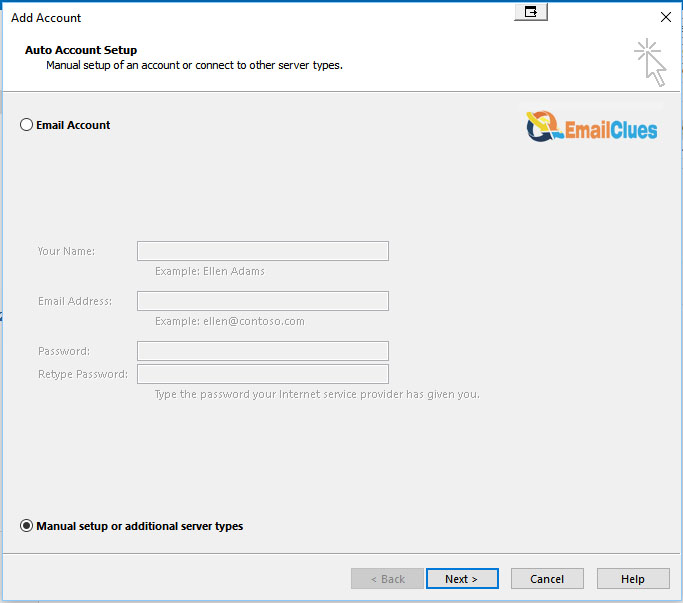
- If Outlook cannot configure your account automatically, you must manually enter your account settings. Click on the Manual setup or additional server types option and then click Next.
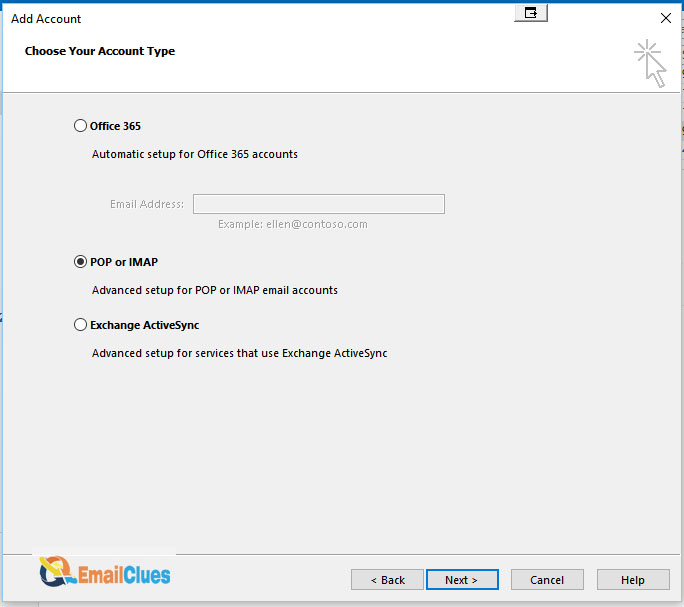
- Select the POP or IMAP option on the next screen and then click Next.
- Now you’ll need to enter your account settings. For the incoming mail server, enter pop.windstream.net.
- For the outgoing mail server, enter smtp.windstream.net. Your username is your full Windstream email address (including the @windstream.net part). Once you’ve entered all the required information, click the More Settings button.
- On the next screen, click on the Outgoing Server tab. Ensure that the My outgoing server (SMTP) requires authentication option is selected and then click the OK button.
- Back on the previous screen, click on the Test Account Settings button. Outlook will now check your account settings and try to connect to the Windstream email servers.
- If everything works correctly, you should see a screen that says All tests completed successfully. Click the Close button to finish.
You can start using your Windstream email account with Microsoft Outlook 365!
Setting up IMAP Manually
If you’re a Windstream email customer, you can manually set up your email account on Microsoft Outlook 365 using the advanced setup option. To do this, you’ll need to know your email address, password, and the names of the Windstream incoming and outgoing mail servers.
Here’s how to set up your Windstream email account on Outlook 365 using the advanced setup option:
- Open Outlook 365 and select File > Add Account.
- Select Advanced Options.
- Enter your name, email address, and password.
- For the Incoming mail server, enter ‘mail.windstream.net’.
- For the Outgoing mail server, enter ‘smtp.windstream.net’.
- Select Next.
- Outlook 365 will now try to connect to your Windstream email account. If the connection is successful, you’ll be able to start using your account right away.
Setting up SMTP Settings
Using Outlook 365 with Windstream, you must set up your SMTP settings to send and receive emails. Here’s how to do it:
- Log in to your Outlook 365 account.
- Go to the Settings section and click on the Accounts tab.
- Click on the + sign to add a new account.
- Enter your Windstream email address and click on the Connect button.
- Enter your Windstream password and click on the sign In button.
- Once your account has been successfully added, click on the Done button.
- Now, go to the Settings section again and click the Mail tab.
- Under the Accounts section, click on the account that you just added.
- Click on the Change Settings button.
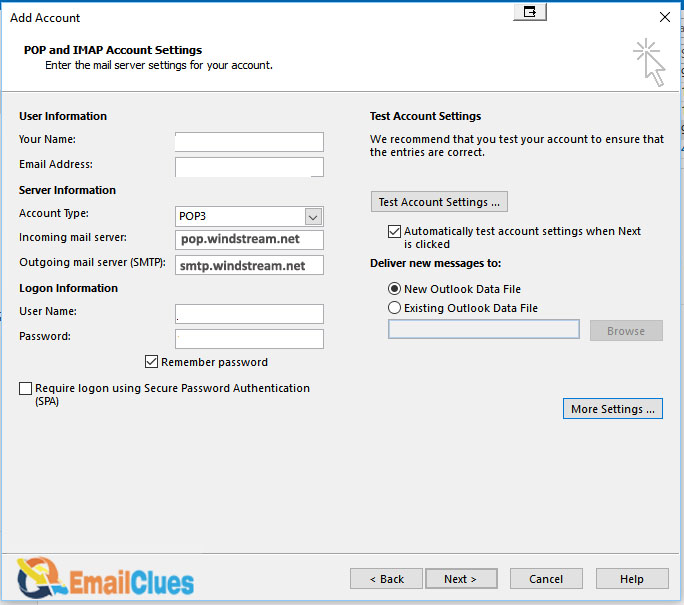
- Enter the following settings under the Outgoing Mail Server section:
- Hostname: smtp.windstream.net
- Port: 587
- Encryption Method: STARTTLS
- Enter the following settings under the Incoming Mail Server section:
- Hostname: pop.windstream.net
- Port: 110
- Encryption Method: None
- Click on the Save button.
That’s it! Your Windstream account should now be successfully set up with Outlook 365, and you should be able to send and receive emails without any issues.
Rejecting my Windstream Mails
If you’re using Outlook 365, you may have noticed that some of your Windstream emails are being rejected. This can be frustrating, mainly if you rely on Windstream for important communication. Here’s a quick guide on what to do if you’re experiencing this issue.
First, try changing your Windstream email settings. Go to the “Advanced” tab and change the “Server Timeouts” to 5 minutes. This should fix the issue for most people.
If that doesn’t work, you’ll need to contact Windstream customer support. They should be able to help you troubleshoot the issue and get your email working again.
In the meantime, you can check your email online by going to the Windstream website.
Connection Setup
This process is quite simple and only requires a few steps. So without further ado, let’s get started!
- First, you’ll need to open up Outlook 365 and navigate to the “File” tab. Once you’re there, click on the “Add Account” option.
- Next, you’ll need to enter your Windstream email address into the appropriate field and click “Next”.
- On the next screen, you’ll be asked to enter your password. Once you’ve done that, click the “Remember password” checkbox and click “Next”.
- Outlook will now attempt to connect to your Windstream account. If all goes well, you should see a “Success” message. Click “Finish” to complete the process.
- And that’s it! You should now be able to send and receive emails from your Windstream account using Outlook 365.
Manual and Automatic Setup
There are two ways that you can set up your Windstream email with Outlook 365 – manual and automatic. We’ll go over both methods so that you can choose the one that’s best for you.
Manual Setup
With the manual setup, you must enter your Windstream email address and password into Outlook 365. To do this, open Outlook 365 and go to the File tab. Click Add account, enter your Windstream email address and click Continue. On the next page, enter your password and click Sign In. Outlook 365 will now connect to your Windstream account and begin syncing your email.
Automatic Setup
The automatic setup is a bit simpler. Open Outlook 365 and go to the File tab. Click Add account, enter your Windstream email address and click Continue. On the next page, click the “Let’s Get Started” button. Outlook 365 will now automatically configure your account and begin syncing your email.
Which setup method you choose is up to you. Both ways will get your email into Outlook 365, so it’s just a matter of personal preference.
Sync Server Check
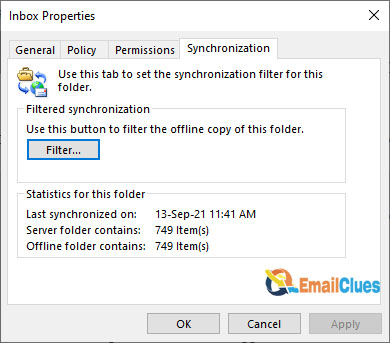
If you’re a Microsoft Outlook 365 user, you can set up your account to work with Windstream email using Microsoft’s Outlook 365 sync server. This will allow you to keep your Outlook contacts, calendar, and email in sync with your Windstream account and will also allow you to access your Windstream email from the Outlook 365 interface. Here’s how to set it up:
- Log in to your Outlook 365 account.
- Click the gear icon in the top-right corner of the screen, then click “Options.”
- Click “Accounts” in the left sidebar.
- Under “Email,” click “Add an account.”
- Enter your Windstream email address, then click “Next.”
- Enter your Windstream password, then click “Sign in.”
- Select the “Change mailbox sync settings” option, then click “Next.”
- Select the “Use the Microsoft Outlook Hotmail Connector” option, then click “Next.”
- Enter your Windstream email address and password again, then click “Finish.”
Your Windstream account should now be set up and working with Outlook 365. You can access your email by clicking the “Mail” icon in the left sidebar.
SMTP Settings
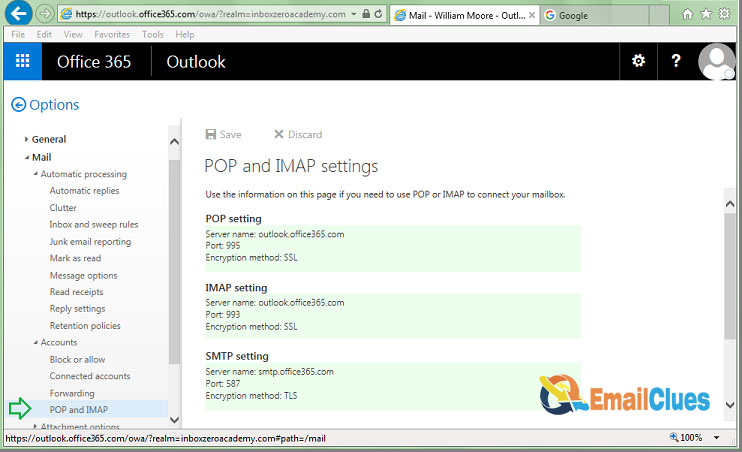
To set up your Windstream email account with Microsoft Outlook 365, you must know the correct SMTP settings to make it happen. Here’s a quick guide on what you’ll need to do:
- Open Outlook and go to File > Add Account.
- Enter your Windstream email address and click Connect.
- Enter your password and click Sign In.
- Select the account type as POP3 and enter the following settings:
- Incoming mail server: pop3.windstream.net
- Outgoing mail server: smtp.windstream.net
- Username: Your full Windstream email address
- Password: Your Windstream email password
- Click Next and then Finish to complete the setup process.


