How to Setup Frontier Email with Thunderbird?
Frontier Email is a service provided by Frontier Communications. It offers email service to its customers with a variety of features, including support for Microsoft Outlook, Apple Mail, and Mozilla Thunderbird. In this article, we will focus on setting up Frontier Email in Thunderbird.
Before we start, you will need the following:
- A Frontier Email account
- The latest version of Mozilla Thunderbird
- The Frontier Email settings
Now that you have everything you need, let’s get started
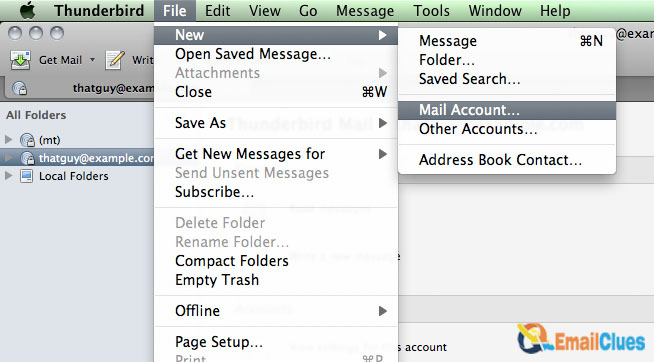
- Open Mozilla Thunderbird and click on the “File” menu.
- Select “New” and then “Existing Mail Account”.
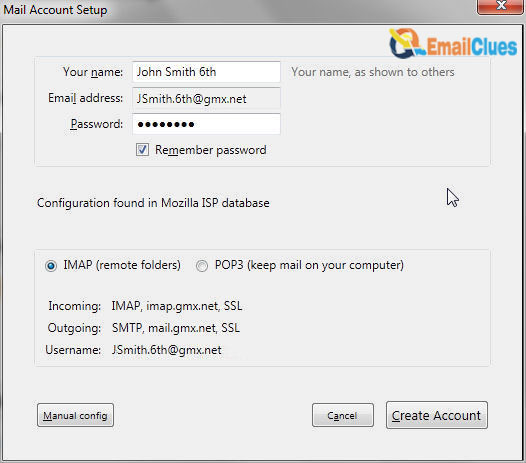
- Enter your Frontier Email address and click “Continue”.
- Thunderbird will now attempt to automatically configure your account. If it is successful, you will see a “Congratulations” message. If not, click on the “Manual Config” button.
- Enter the following Frontier Email settings:
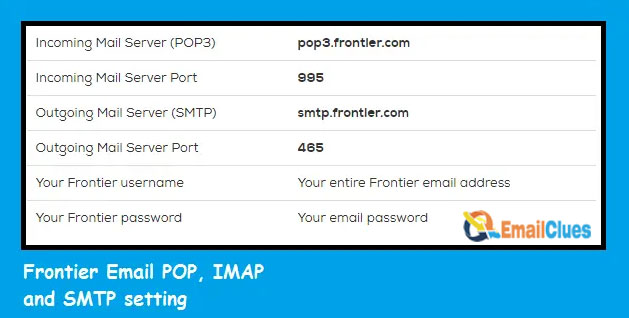
- Incoming Server: pop.frontier.com
- Port: 110
- Outgoing Server: smtp.frontier.com
- Port: 587
- Username: Your Frontier Email address
- Password: Your Frontier Email password
- Click “Continue” and then “Finish”.
- Your Frontier Email account should now be successfully configured in Thunderbird.
Enable IMAP in Frontier Email
If you’re a Frontier Email user, you may want to access your email through an email client like Thunderbird, Outlook, or Apple Mail. To do this, you need to enable IMAP in Frontier Email. Here’s how:
- Log in to your Frontier Email account.
- Click on the gear icon in the top right corner and select “Settings”.
- On the Settings page, select the “Forwarding and POP/IMAP” tab.
- Under the “IMAP Access” section, select “Enable IMAP”.
- Click the “Save Changes” button at the bottom of the page.
- Now that IMAP is enabled in your Frontier Email account, you can set up your email client of choice and start accessing your email from there.
Frontier Email IMAP Settings
IMAP (Internet Message Access Protocol) is the most recent standard for accessing email messages. It allows you to download messages from a server and store them locally on your computer. It also lets you keep your messages in sync between multiple computers.
To set up your Frontier email account in Thunderbird:
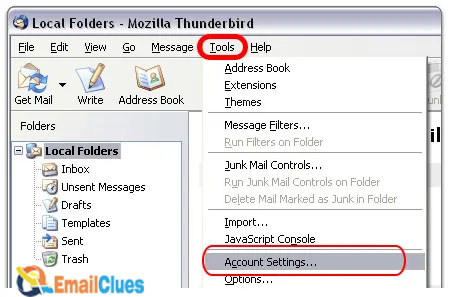
- Open Thunderbird and go to Tools > Account Settings.
- Click the Account Actions button and select Add Mail Account.
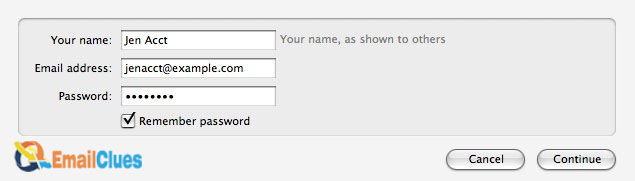
- Enter your name, email address, and password. Click Continue.
- Thunderbird will automatically detect the Frontier email server settings. Click Done.
- Your Frontier email account is now set up in Thunderbird!
SMTP Server for Thunderbird
Setting up your Frontier email account in Thunderbird is a quick and easy process. In just a few simple steps, you’ll be up and running in no time.
Before we begin, you’ll need to make sure you have the following information handy:
- Your Frontier email address
- Your Frontier email password
- The incoming mail server for your Frontier account (pop.frontier.com)
- The outgoing mail server for your Frontier account (smtp.frontier.com)
Now, let’s get started!
- Open Thunderbird and click on the File menu.
- Select New > Existing Mail Account.
- Enter your Frontier email address and password, then click Continue.
- Thunderbird will now attempt to automatically configure your account settings. If successful, click Done. Otherwise, click Manual Config.
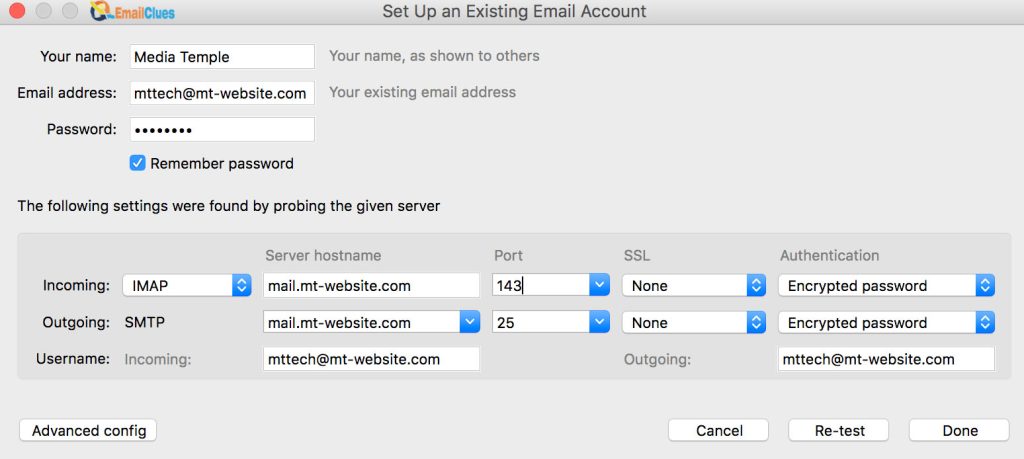
- On the Manual Config screen, enter the following settings.
- Incoming Server: pop.frontier.com
- Outgoing Server: smtp.frontier.com
- Click Done.
- That’s it! Your Frontier email account is now set up in Thunderbird and ready to use.
Incoming/Outgoing Settings
One of the great things about Thunderbird is that it can be easily configured to work with a variety of different email providers. If you’re looking to use Thunderbird with your Frontier email account, here’s a quick guide on how to set it up.
- First, open Thunderbird and go to the File menu. Select New > Existing Mail Account.
- In the next window, enter your name, email address, and password. Make sure the Type of incoming server is set to POP.
- For the incoming server, enter pop.frontier.com. The port should be set to 110.
- For the outgoing server, enter smtp.frontier.com. The port should be set to 587.
- Click the Continue button. Thunderbird will now try to connect to your Frontier email account.
- Once the account has been successfully configured, you can start using Thunderbird to send and receive emails.
Checking Your Frontier Email in Thunderbird
If you’re a Frontier Email customer, you can use Mozilla Thunderbird to check your email. To do this, you’ll need to set up a new account in Thunderbird using the following instructions:
- Open Thunderbird and click on the menu icon in the top right corner.
- From the drop-down menu, select “Options.”
- In the “Options” window, select “Account Settings.”
- In the “Account Settings” window, select “Account Actions” from the menu on the left and then click “Add Mail Account.”
- In the “Add Mail Account” window, enter your name, Frontier email address, and password. Then click “Continue.”
Thunderbird will now try to automatically set up your account. If it is successful, you can click “Finish” to close the window. If not, you’ll need to select “Manual Config” and enter the following settings:
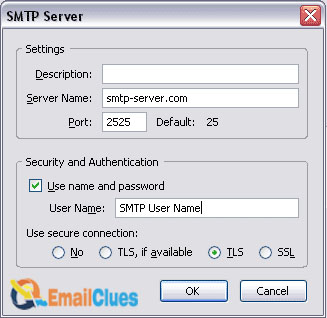
Server Settings:
- Incoming: pop.frontier.com
- Port: 110
- SSL/TLS: STARTTLS
- Outgoing: smtp.frontier.com
- Port: 587
- SSL/TLS: STARTTLS
- Username: Your full Frontier email address (including @frontier.com)
- Click “Done” to close the window and you’re all set!
Setting up Frontier Email with Thunderbird: Manual and Automatic Settings
If you are a Frontier Email user, you may want to set up your account in Mozilla Thunderbird. Setting up Frontier Email in Thunderbird is a straightforward process and can be done either manually or automatically. In this section, we will show you both methods.
Method 1: Setting up Frontier Email in Thunderbird Manually
The manual method is the recommended way to set up your Frontier Email account in Thunderbird. To do this, you will need to gather some information about your account such as your email address, password, and the incoming and outgoing server settings.
- Open Mozilla Thunderbird and click on the File menu.
- Select New > Existing Mail Account.
- Enter your name, email address, and password. Click Continue.
- Select POP or IMAP as your incoming server type.
- Enter the incoming server settings. For POP, the server name is pop.frontier.com and the port is 110. For IMAP, the server name is imap.frontier.com and the port is 993.
- Enter the outgoing server settings. The server name is smtp.frontier.com and the port is 587.
- Click OK to save the settings and finish the account setup.
That’s it! Your Frontier Email account is now set up in Mozilla Thunderbird and you can start sending and receiving messages.
Method 2: Setting up Frontier Email in Thunderbird Automatically
The automatic method is the easier way to set up your Frontier Email account in Thunderbird. With this method, you only need to enter your email address and password. Thunderbird will automatically detect the rest of the settings.
- Open Mozilla Thunderbird and click on the File menu.
- Select New > Existing Mail Account.
- Enter your name, email address, and password. Click Continue.
- Thunderbird will now attempt to automatically detect the incoming and outgoing server settings. If the settings are detected successfully, you will see a confirmation message. Click OK to finish the account setup.
- That’s it!