How to Setup Frontier E-mail with Outlook 365?
Setup Frontier E-mail on Outlook365
If you’re a Frontier customer, you can set up your Frontier e-mail in Outlook 365. This guide will show you how to do it.
- In the Incoming mail server field, enter pop3.frontier.com.
- In the Outgoing mail server (SMTP) field, enter smtp.frontier.com.
- Enter your full e-mail address (including @frontier.com) in the User Name field.
- In the Password field, enter your password.
- Leave the Require logon unchecked using the Secure Password Authentication (SPA) box.
- Click OK.
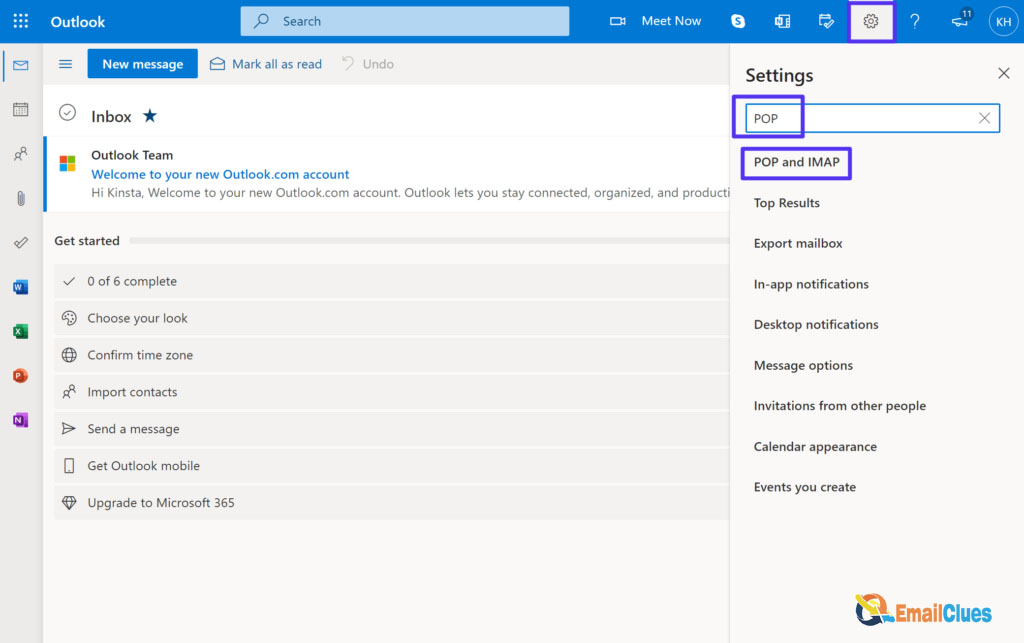
- First, open Outlook 365 and click the Settings gear icon in the top-right corner. Then, click on View all Outlook settings.
- In the Outlook settings window, click on the Accounts tab. Then, click on the + Sign to add a new account.
- In the Add Account window, enter your Frontier e-mail address and click Continue.
- Enter your Frontier e-mail password on the next screen and click Sign in.
- Outlook will now set up your Frontier e-mail account. Once it’s finished, you’ll see your Frontier e-mail account listed under the Accounts tab.
- That’s it! You can now start using your Frontier e-mail in Outlook 365.
Set up IMAP manually
If you’re a Frontier E-mail user, you know it’s one of the most popular e-mail providers. But you may not know that you can manually set up your Frontier E-mail account with Microsoft Outlook 365. Here’s how:
1. Open Microsoft Outlook 365.
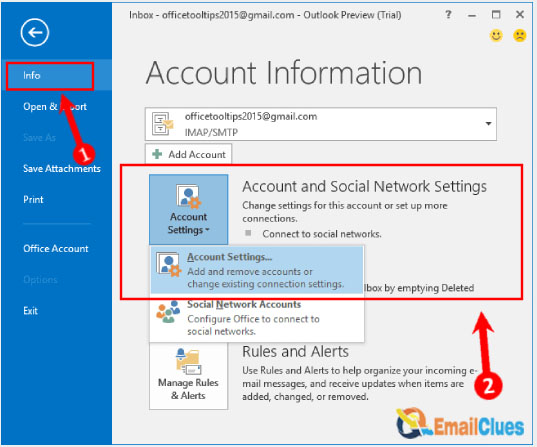
2. Click on the File tab in the upper-left corner.
3. Under the Account Information section, click on the + Sign.
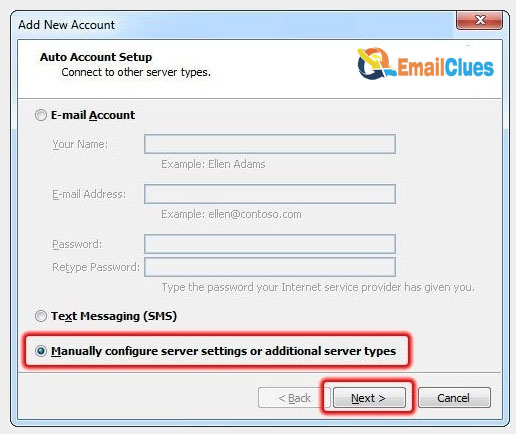
4. Select Manual setup or additional server types in the Choose Service dialog box and click Next.
5. On the Choose Account Type dialog box, select IMAP and click Next.
6. Enter the following information on the Server Settings dialog box and click Next.
- In the Your Name field, enter your name as you want it to appear on your outgoing e-mails.
- In the E-mail Address field, enter your full Frontier E-mail address.
- In the Account Type drop-down menu, select IMAP.
- In the Incoming mail server field, enter “mail.frontier.com.”
- In the Outgoing mail server (SMTP) field, enter “mail.frontier.com.”
7. Enter your Frontier E-mail account credentials on the next dialog box and click Next.
- In the User Name field, enter your full Frontier E-mail address.
- In the Password field, enter your Frontier E-mail password.
8. Click Finish.
And that’s it! You’ve successfully set up your Frontier E-mail account with Microsoft Outlook 365.
Server Name
If you want to set up your Frontier e-mail with Outlook 365, you’ve come to the right place. In this section, we’ll walk you through the process step-by-step.
Before we get started, you’ll need to make sure that you have the following information handy:
- Your Frontier e-mail address
- Your Frontier e-mail password
- The incoming mail server for Frontier (POP3)
- The outgoing mail server for Frontier (SMTP)
With that out of the way, let’s get started.
1. Open Outlook 365 and click on the File tab.
2. Next, click on the Add Account option.
3. Enter your Frontier e-mail address and click on the Connect button.
4. Enter your Frontier e-mail password and click on the OK button.
5. Next, you must enter Frontier’s POP3 and SMTP settings. The POP3 server is pop3.frontier.com, and the SMTP server is smtp.frontier.com.
6. Click the Next button once you’ve entered the correct settings.
7. Outlook will now test the connection to the Frontier servers. Once the test is complete, you should see a message that says, “All tests completed successfully.”
8. Click on the Done button, and you’re all set! Your Frontier e-mail account should now be up and running in Outlook 365.
Sync Server check
If you’re having trouble setting up your Frontier e-mail account in Outlook 365, one potential issue could be that your Sync Server settings aren’t correct. Here’s how to check and fix them if necessary:
1. Open Outlook and go to File > Account Settings >.
2. Select your Frontier e-mail account and click Change.
3. Click More Settings.
4. In the POP and IMAP Settings dialog box, check that your Sync Server settings are correct:
For IMAP accounts:
- In the Incoming mail server field, enter frontier.com.
- In the Outgoing mail server (SMTP) field, enter smtp.frontier.com.
- Enter your full e-mail address (including @frontier.com) in the User Name field.
- In the Password field, enter your password.
- Leave the Require logon unchecked using the Secure Password Authentication (SPA) box.
- Click OK.
For POP accounts:
5. Click the Outgoing Server tab in the Internet E-mail Settings dialog box.
6. Select the My outgoing server (SMTP) requires authentication check box.
7. Under Use the same settings as my incoming mail server, click OK.
8. Click Next, then Finish.
Your Frontier e-mail account should now be correctly configured in Outlook 365.
Manual and Automatic Setup
There are two ways to set up your Frontier e-mail with Outlook 365: manual and automatic. If you have a POP3 or IMAP e-mail account, you can set it up manually. If you have a Frontier e-mail account, you can set it up automatically. With a POP3 or IMAP account, you must enter your e-mail address, password, and server settings. With a Frontier account, you must enter your e-mail address and password.
Here are the steps for each method:
Manual Setup
3. Enter your name, e-mail address, and password.
1. Open Outlook 365.
2. Go to File > Add Account.
4. Select Manual setup or additional server types.
5. Select POP or IMAP.
6. Enter the incoming and outgoing server settings.
7. Click Test Account Settings.
8. Click Next.
9. Click Finish.
Automatic Setup
1. Open Outlook 365.
2. Go to File > Add Account.
3. Enter your name, e-mail address, and password.
4. Select Frontier.
5. Enter your Frontier e-mail address and password.
6. Click Test Account Settings.
7. Click Next.
8. Click Finish.
SMTP, POP & IMAP Server Settings
Here are the SMTP settings you will need to set up your Frontier e-mail with Outlook 365:
- SMTP Server: smtp.frontier.com
- SMTP Port: 587
- SSL Protocol: OFF
- TLS Protocol: ON
- POP3 Server: pop3.frontier.com
- POP3 Port: 110
- SSL Protocol: OFF
- IMAP Server: imap.frontier.com
- IMAP Port: 143
- SSL Protocol: OFF
That’s all you need to know to set up your Frontier e-mail with Outlook 365. Enter these settings into the appropriate fields in Outlook, and you should be ready.