How to Connect Frontier Email to Gmail?
If you’re a Frontier email user, you may want to consider connecting your account to Gmail. Doing so will allow you to take advantage of Gmail’s many features, including its user-friendly interface, robust search capabilities, and integrations with other Google services. Plus, if you ever decide to switch email providers, connecting your Frontier account to Gmail makes transferring your old emails to your new account easy.
In this article, we’ll walk you through connecting your Frontier email to Gmail. We’ll also provide some troubleshooting tips if you encounter any problems along the way.
Setting up Frontier Email to Gmail
Are you a Frontier Email user who is looking to switch to Gmail? If so, you’re in luck! Connecting Frontier Email to Gmail is a relatively simple process that can be completed in just a few steps.
- To connect Frontier Email to Gmail, you must first set up a Gmail account if you do not already have one.
- Once done, you must log into your Frontier Email account and navigate to the ‘Settings’ page.
- On the ‘Settings’ page, you must scroll down to the ‘Email Forwarding’ section and select the ‘Add Email Forwarding Address’ option.
- In the ‘Email Forwarding Address’ field, you must enter the email address you created for your Gmail account. Once you have entered your Gmail address, select the ‘Add’ button to save your changes.
- Now that you have added your Gmail address as a forwarding address, you only need to set up Gmail to check your Frontier Email account.
- You can log into your Gmail account and navigate to the ‘Settings’ page. On the ‘Settings’ page, select the ‘Accounts and Import’ tab and click the ‘Add a mail account’ option.
- On the ‘Add a mail account’ page, enter your Frontier Email address in the ‘Email Address’ field and click the ‘Next Step’ button.
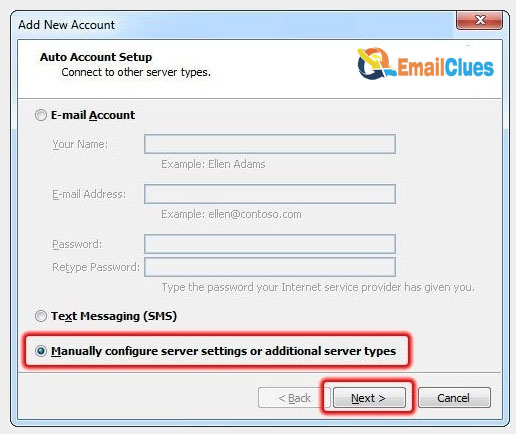
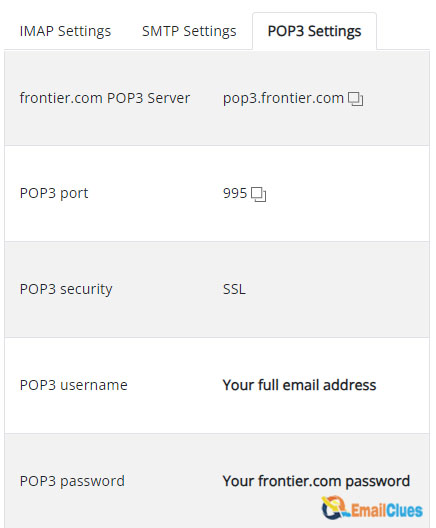
- On the next page, you will need to select the ‘POP3’ option and enter the following information in the appropriate fields:
- Username: Your Frontier Email address
- Password: Your Frontier Email Password
- POP Server: pop.frontier.com
- Port: 995
- Once you have entered all the required information, you must click on the ‘Add Account’ button to complete the process. Your Frontier Email account should now be successfully connected to your Gmail account!
Accessing Frontier Email mails in Gmail
You can connect your Frontier Email account to Gmail, making checking all your emails in one place more accessible. To do this, you must set up Frontier Email in Gmail. This process is relatively simple and only requires a few steps.
- First, you need to open Gmail and click on the settings icon in the top right corner. From the drop-down menu, select “Settings.”
- On the Settings page, scroll to the “Accounts and Import” section and click the “Add a mail account” option.
- In the “Add a mail account” window, enter your Frontier Email address and click “Next Step.” Enter your Frontier Email password on the next page and select “POP3” as the account type.
- For the incoming mail server, enter “pop.frontier.com,” and for the outgoing mail server, enter “smtp.frontier.com.” Once you have entered all the required information, click “Add Account.”
- You will then be taken to a page where you can set additional options for your Frontier Email account. For example, you can leave copies of your Frontier Email messages on the server to access them from other devices. Once you have made your selections, click “Save Changes.”
- That’s all there is to it! You should now be able to check your Frontier Email account from Gmail.
Adding Frontier Email to Gmail App
There are several ways to add your Frontier email to the Gmail app on your Android device. One way is to set up your Frontier email account as an IMAP account in the Gmail app. Another way is to set up your Frontier email account as a POP3 account in the Gmail app.
To set up your Frontier email account as an IMAP account in the Gmail app:
1. Open the Gmail app on your Android device.
2. Tap the menu icon in the top left corner of the screen.
3. Tap the settings icon.
4. Tap the Add Account option.
5. Tap the Personal (IMAP/POP) option.
6. Enter your Frontier email address in the Email field.
7. Enter your Frontier email password in the Password field.
8. Tap the Next button.
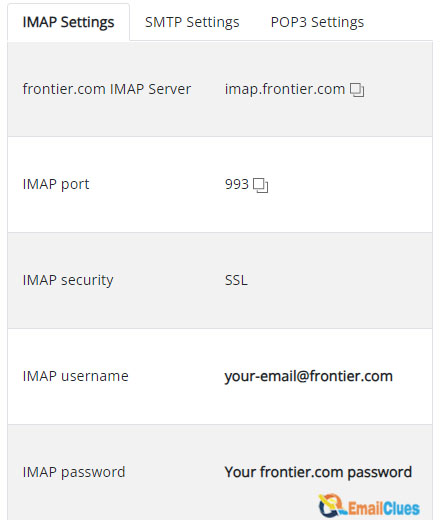
9. Enter the following Frontier IMAP server settings:
- IMAP Server: mail.frontier.com
- IMAP Port: 993
- IMAP Security: SSL/TLS
10. Tap the Next button.
11. Enter the following Frontier SMTP server settings:
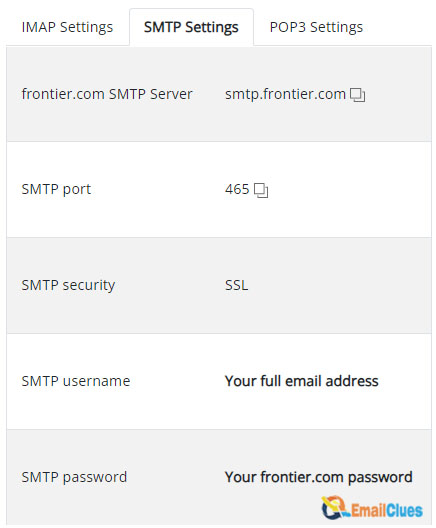
- SMTP Server: mail.frontier.com
- SMTP Port: 587
- SMTP Security: STARTTLS
12. Tap the Next button.
13. Tap the Done button.
Your Frontier email account should now be set up as an IMAP account in the Gmail app.
To set up your Frontier email account as a POP3 account in the Gmail app:
1. Open the Gmail app on your Android device.
2. Tap the menu icon in the top left corner of the screen.
3. Tap the settings icon.
4. Tap the Add Account option.
5. Tap the Personal (IMAP/POP) option.
6. Enter your Frontier email address in the Email field.
7. Enter your Frontier email password in the Password field.
8. Tap the Next button.
9. Enter the following Frontier POP server settings:
- POP Server: mail.frontier.com
- POP Port: 995
- POP Security: TLS


