Setup Mail Through Godaddy Domain

GoDaddy, also known as godaddy.com, involves registering internet domains. (i.e., websites name) and hosting website data on its servers. If you want to make a more professional email, it’s one of them for you. Here’s the Detailed Guide on How to Setup Mail Through Godaddy Domain.
Why you Should Setup Mail Through Godaddy Domain?
Godaddy is the largest domain registrar in the world. Here you can get the number of domain extensions to purchase. With its best domain deals and world-class security, it’s the best and safe to set up mail in Godaddy Domain.
Consideration Before GoDaddy Email Setup
Must have a working GoDaddy Account.
Must need to have the Domain in your GoDaddy Account.
Setup Mail Through Godaddy Domain
Setting up Godaddy Email is an easy process. You can easily set up mail with Godaddy Domain. Here are the Godaddy Email Setup Steps,
Step I – Sign in to your Godaddy Account
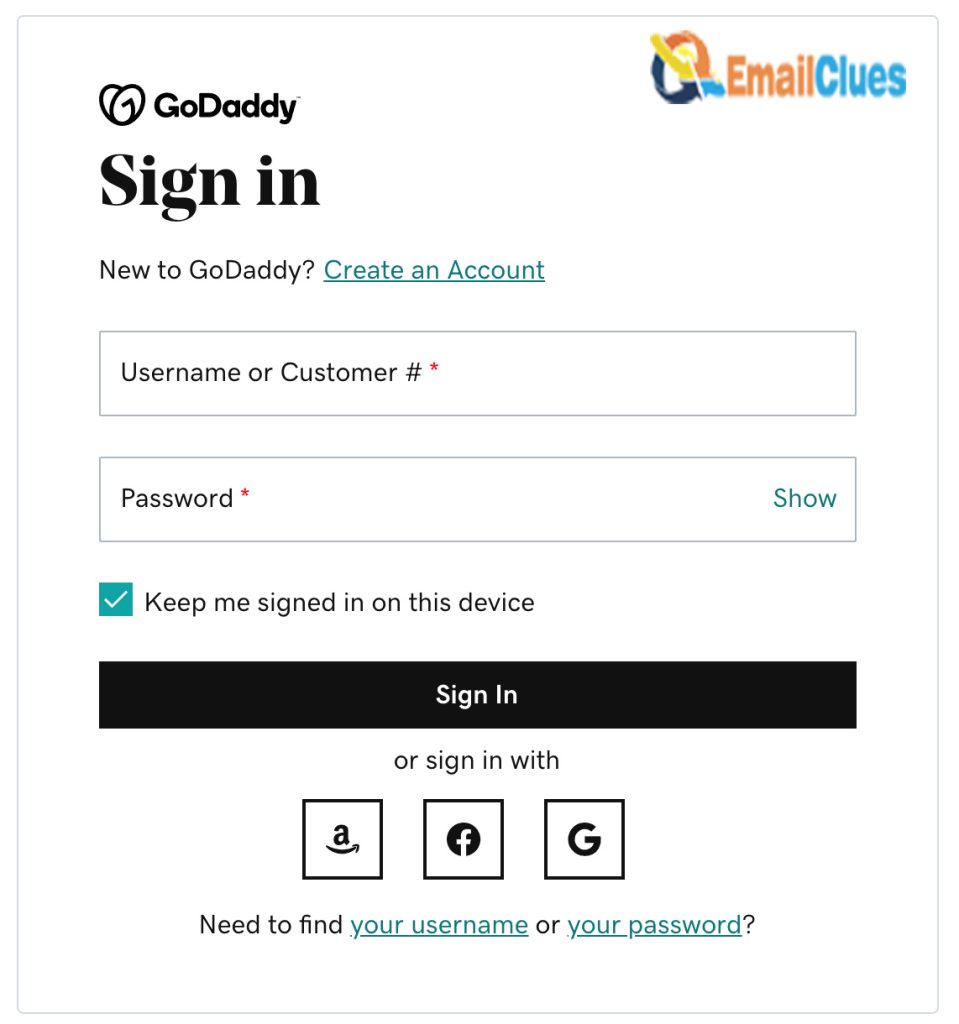
- First, you need to sign in to your Godaddy Account.
- Visit Godaddy.com or any country-based extensions.
- Go to the GoDaddy Account section.
- Click on the My Products tab from the dropdown menu.
- Scroll down and go to the Domains section. Here you can find your Domain list.
- Choose the Domain in which you want to set up mail.
- Click on Setup an Email Account.
Step II – Decide the Plan and complete the purchase
While performing Godaddy Email Setup Steps, you must subscribe to the plans per your need. Here GoDaddy Offers two plans, i.e., individual and team Plans.
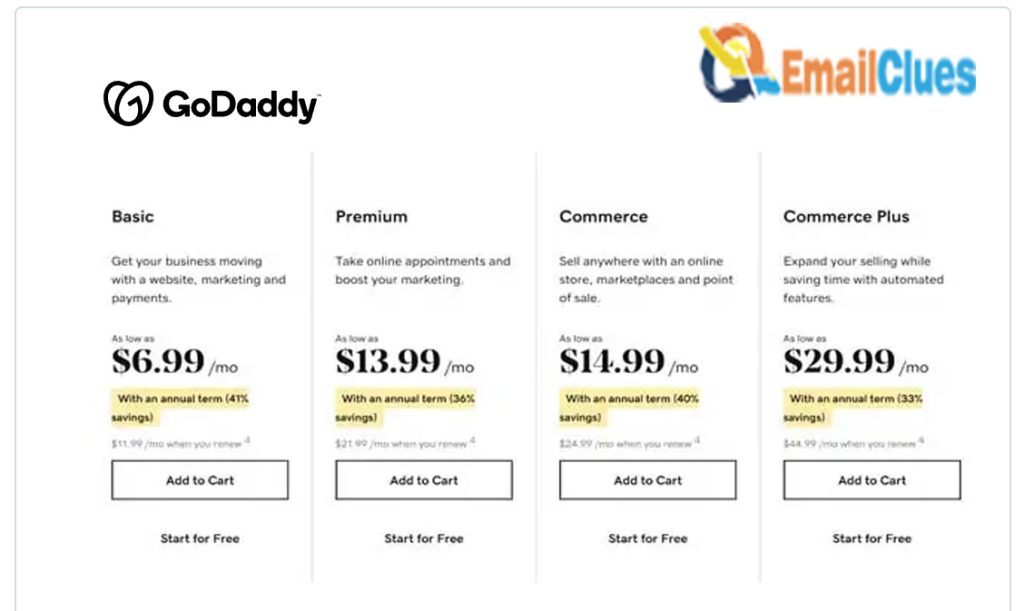
- Select the Plan as per your budget and feature requirements.
- Choose the duration of the plan as per your needs.
- Click on Add to Cart.
- Now review all the details and click on I am Ready to Pay.
- Choose the Payment method which you want to use. Depending upon the country base, you can get different payment methods.
Step III – Setting Up Email Account
Now you need to set up your email account manually. Here’s how to set up Mail Through Godaddy Domain.
Choose the Domain and click on Continue.
Enter the Details to Create Account Information,
Username: You can set the username as per your needs. This is the name that will show in the Domain of your email, like [email protected].
First & Last Name: Here, you can enter your/ your business name.
Link Domains: Here, you need to choose the Domain from the dropdown box to link the Domain to your email.
Password: Set the Strong Password for your Email Account.
After filling up the Information, click on Create.
Step IV — Finalizing the Setup Process
After a few minutes, the Pop-up window appears on your screen, showing the message, Congratulations, xyz is Live. Now continue more steps,
- Click on Sign in to the email shown below the Pop-up.
- Set the recovery email there, and click on Save & Continue.
That’s it. Now you will be redirected to your Email Account