How to Setup AOL with Windows?
If you are on Windows Mail, you can easily set up your AOL Email Account. AOL is one of the USA-based free email services used for receiving emails.
This tutorial will guide you on how to set up AOL mail in Windows with an automatic and manual setup. Check the process to Setup AOl in your Windows PC here,
How to Setup AOL with Windows
Setup AOL with Windows using Windows Mail App in Windows 10 & 11
One of the easiest methods to set up AOL Mail on Windows is Windows 10 Mail. The latest Windows 10, 11 allows the pre-installed Mail app. Using this, and you can easily configure the Manual and Automatic Setup here
,
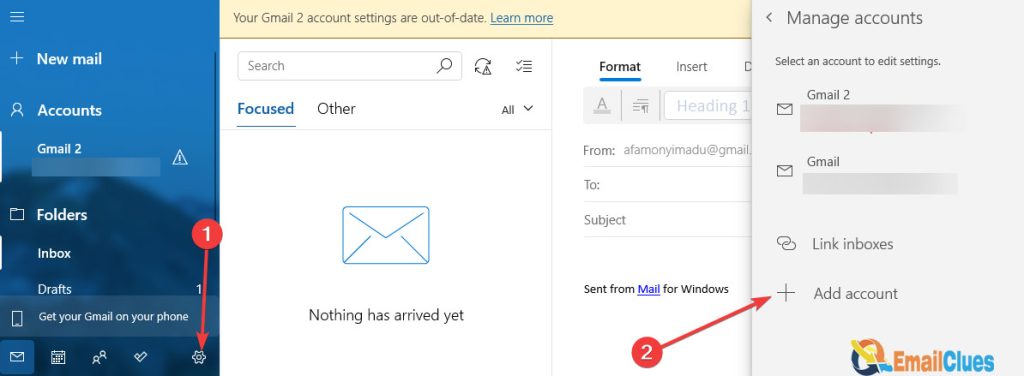
- Open the Windows Mail App on your PC or Windows.
- Click on the Settings icon given there.
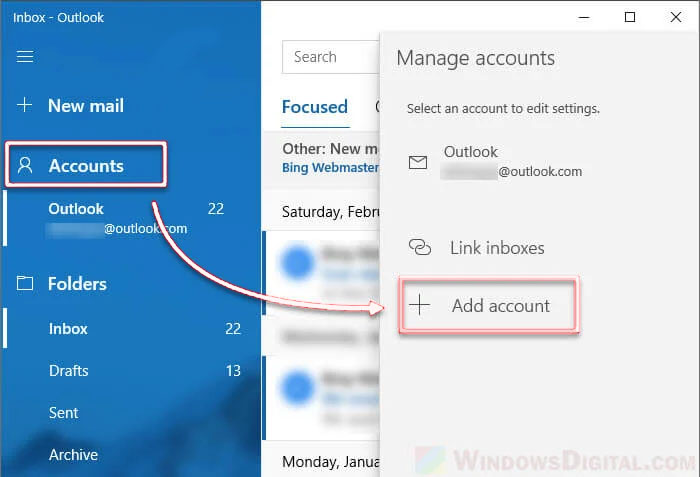
- Then click on Manage Accounts.
- Click on Add Account. It will open the different email services,
- Click on the Other Account (POP/IMAP).
- It will open the Other Account section to fill out the details,
- Enter your Email Address and Password there.
- After that, click on the Sign in option there.
- At last, click on Done. That’s it.
This simple process allows you to set up AOL with Windows in your Mail app. It’s an automatic process to set up AOL mail on Windows PC.
Setup AOL Mail on Windows Mail (Windows 8.1)
You can still set up AOL mail for the older version of Windows to receive the mail automatically. Here’s how,
- Open the Windows Mail app and then go to the Settings of the Mail App.
- Click on Accounts>Add Account.
- Select the AOL from the Given List.
- Enter your Email Details there and click on Connect.
How to Export AOL Email in Windows Live Mail
Another method that will help to get access to your AOL Email is by exporting the AOL Mails. For this, you need to have the SysTools.
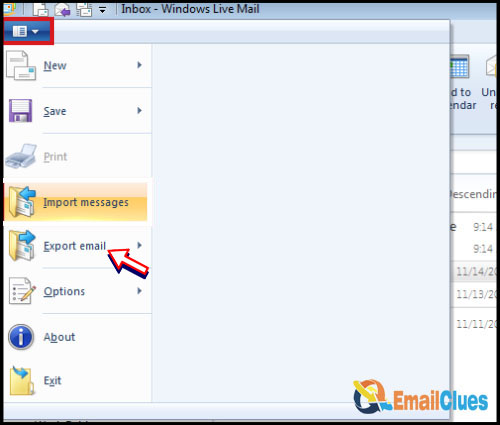
- Download and Install the SysTools on your PC.
- Get logged in there with your Email Details.
- From the Dashboard, go to the Select Email Format tab.
- Now select the destination and apply the filters from the Filters tab.
- After all, click on the Start button there.
- Your data will get imported successfully in EML files.
- To view this, open it with the Windows Mail App.
That’s the simple steps to set up AOL Mail on Windows, including importing AOL Emails.
How to Setup AOL in Windows Outlook 365
- Open the Outlook 365 in your System.
- Go to the File tab and then Add Account,
- Under the Add Account, select Manual Setup,
- Now click on Next, choose POP or IMAP, then Next.
- Here you need to enter the following Information,
Under User Information
Your Name: Enter your name or business name
Email Address: enter your AOL email address here
- Now click on the Next icon.
- Go to the Outgoing Server tab and then check the My outgoing server (SMTP) requires authentication.
- Also, check the Use same settings as my incoming mail server there,
- Then click on OK,
- Now go to the Advanced tab and then ensure the settings are default. If not, then your settings must be like this,
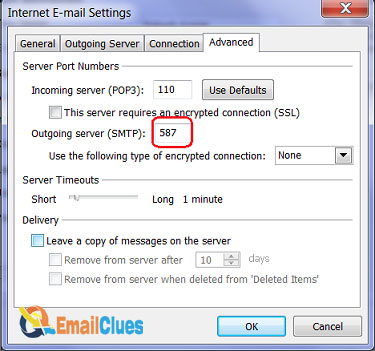
Incoming Server (POP3): 110
Outgoing Server (SMTP): 587
IMAP Settings
AOL IMAP Server Name:imap.aol.com
Port Number: 993
Encryption: SSL
Password: Your AOL Email Password
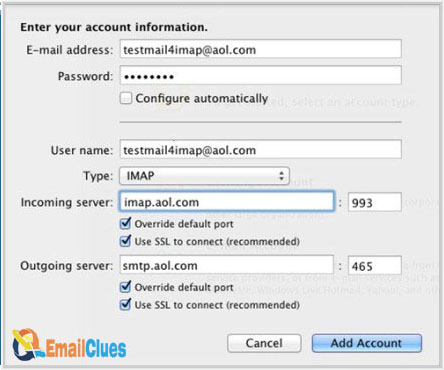
SMTP Settings
AOL SMTP Server Name: smtp.aol.com
Port Number: 465
Encryption: SSL
Password: Your AOL Email Password
- Now choose the encryption method to SSL/TLS.
- At last, click on OK to save all the settings.
- Click on Next>Finish.
How to Sync AOL Email in Windows?
If you are not getting the new mail or facing some issues due to certain issues, then you can sync your AOL email with these steps,
Disable 2FA
The easiest method that will help to fix the syncing issue is by disabling the 2FA. Although the Two-Step Verification is a good step, it may cause your AOL server to transfer the data.
So, disable the Two Factor Authentication of your Account.
Use the other Email Client
Another method to fix the AOL Mail sync issue is using different email clients. You can use the different email clients to set up your AOL email account.
Remove and Readd your AOL Account
If your AOL Email still can’t sync, you can remove and read the AOL Account. To remove, go to Manage Accounts>Delete>Select Delete Account.


