Which Follow Simple Steps to Add Juno Webmail into Windows Computer?

Adding your Juno email account to your Windows computer is a simple process that only requires a few steps. Once you have your Juno email account set up, you will be able to send and receive emails from your Windows computer just like you would from any other email account.
Here are the steps you need to follow:
1. Open the Control Panel on your Windows computer.
2. Click on the “Mail” icon.
3. Select the “Email Accounts” option.
4. Click on the “Add a new email account” option.
5. Select the “POP3” option.
6. Enter your Juno email address in the “Email Address” field.
7. Enter your Juno password in the “Password” field.
8. Enter “pop.juno.com” in the “Incoming Mail Server” field.
9. Enter “smtp.juno.com” in the “Outgoing Mail Server” field.
10. Click on the “Next” button.
11. Click on the “Finish” button.
That’s all you need to do to add your Juno email account to your Windows computer. Once you have followed these steps, you will be able to send and receive emails from your Juno account just like you would from any other email account.
IMAP/POP server connection
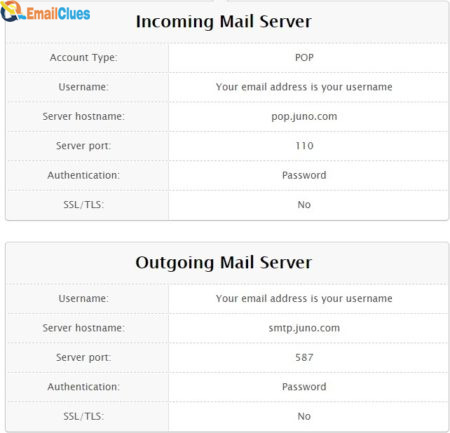
| Email Settings | Port Number |
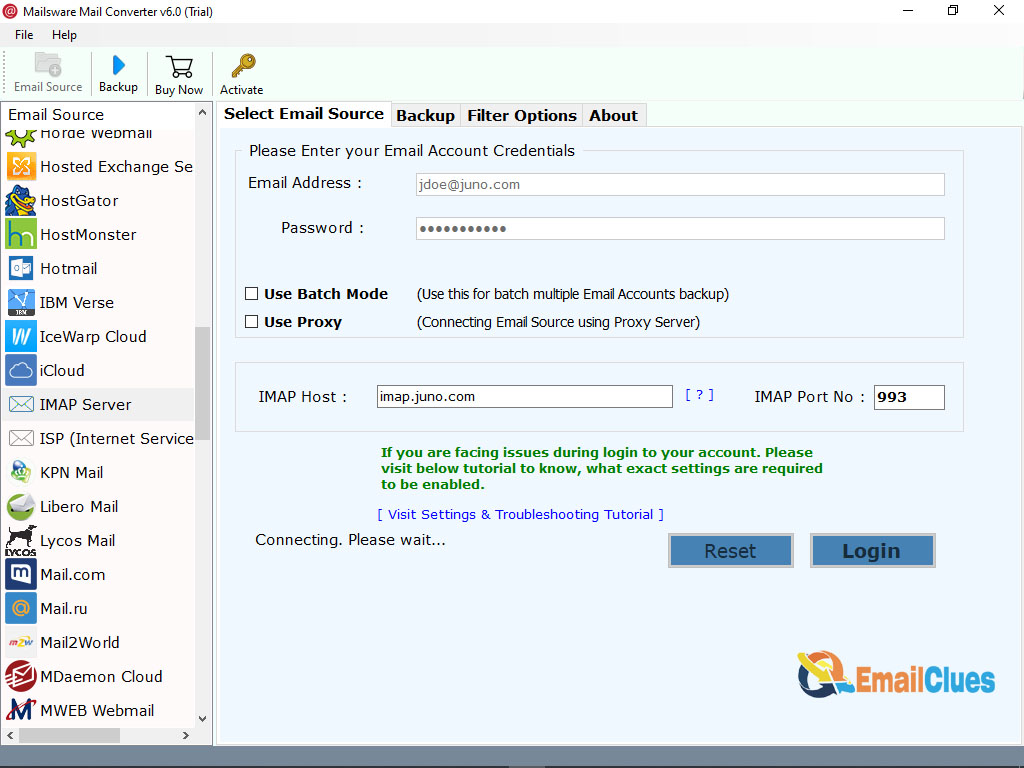
| Juno Webmail IMAP Incoming mail server: imap.juno.com | 993, requires SSL 143, non-secure |
| Juno Webmail POP3 Incoming mail server: pop.juno.com | 995, requires SSL/ Encryption 110, non-secure |
| Juno Webmail SMTP Outgoing mail server: smtp.juno.com | 465, requires SSL 587, non-secure |
Manage Juno email on your computer
If you’re a Juno member, you can manage your email account on your computer by following the steps below.
- First, you’ll need to download and install the Juno software on your computer. You can do this by visiting the Juno website and clicking on the “Download” link.
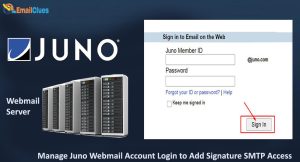
- Once the software is installed, you’ll need to launch it and log in using your Juno username and password.
- Once you’re logged in, you’ll be able to access all of your Juno email messages and folders. You can also use the Juno software to compose and send new email messages.
If you need help at any point, you can visit the Juno Help Centre for more information.
Custom Settings for Juno email
There are many email clients available for Windows, but Juno is one of the most popular. If you’re using Juno, you may be looking for ways to customize it to better suit your needs. Here are three custom settings you can use to make Juno work better for you.
1. Change the default font size.
The default font size in Juno is too small for many people. To change it, go to the “Tools” menu, then “Options.” Click on the “Compose” tab and then “Fonts.” Change the “Default Font Size” to something larger, such as 12 or 14.
2. Change the default message format.
By default, Juno sends messages in HTML format. This can be problematic if you’re sending messages to people who use different email clients, as they may not be able to read HTML-formatted messages. To change the default message format, go to the “Tools” menu, then “Options.” Click on the “Compose” tab and then “Message Format.” Change the “Default Message Format” to “Plain Text.”
3. Use a different outgoing mail server.
If you’re having trouble sending email with Juno, you may need to use a different outgoing mail server. To do this, go to the “Tools” menu, then “Options.” Click on the “Advanced” tab and then “SMTP.” Enter the address of a different outgoing mail server in the “SMTP Server” field. You can find a list of public SMTP servers here.
These are just a few of the ways you can customize Juno to better suit your needs.
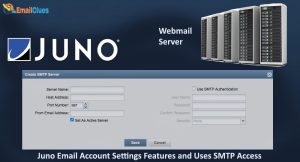
Account Management with Juno:
Assuming you have successfully installed Juno on your Windows, the next thing you need to do is set up your account. This section will guide you through the process of creating and managing your account within Juno.
- The first thing you need to do is launch the Juno application. Once the application is open, click on the “Account” tab. This will bring up the “Account Management” window.
- In the “Account Management” window, you will see a list of all the accounts currently set up on your machine. If this is your first time using Juno, this list will be empty. To create a new account, click on the “Create New Account” button.
- This will bring up the “Create New Account” wizard. The first thing you need to do is enter your name and email address. Once you have done this, click on the “Next” button.
- On the next page of the wizard, you will need to enter your Juno username and password. Once you have done this, click on the “Next” button.
- On the final page of the wizard, you will need to enter your Juno account number. Once you have done this, click on the “Finish” button.
Your new Juno account will now be created and you will be able to use it to access your email, chat, and other Juno services.
How to save your Juno Credentials?
If you use Juno on a shared computer, you may want to save your Juno credentials so that you don’t have to enter them every time you launch the app. Here’s how to do it:
1. Open Juno and click on the ‘Settings’ icon in the top-right corner.
2. In the ‘Settings’ menu, select ‘Account Settings’.
3. In the ‘Account Settings’ menu, click on the ‘Change Password’ option.
4. In the ‘Change Password’ menu, enter your current password in the ‘Old Password’ field, your new password in the ‘New Password’ field, and then click on the ‘Save’ button.
5. In the ‘Settings’ menu, click on the ‘Logout’ option.
6. In the ‘Logout’ menu, click on the ‘Confirm’ button.
7. In the ‘Settings’ menu, click on the ‘Save Credentials’ option.
8. In the ‘Save Credentials’ menu, enter your Juno username and password, and then click on the ‘Save’ button.
That’s it! Your Juno credentials will now be saved and you won’t have to enter them every time you launch the app.