9 Settings to Setup Yahoo Mail on Iphone/Ipad Manual Auto Configuration
Follow the below steps to set up your yahoo mail on your iphone or ipad
1)Open settings
2)In the settings,choose “mail”
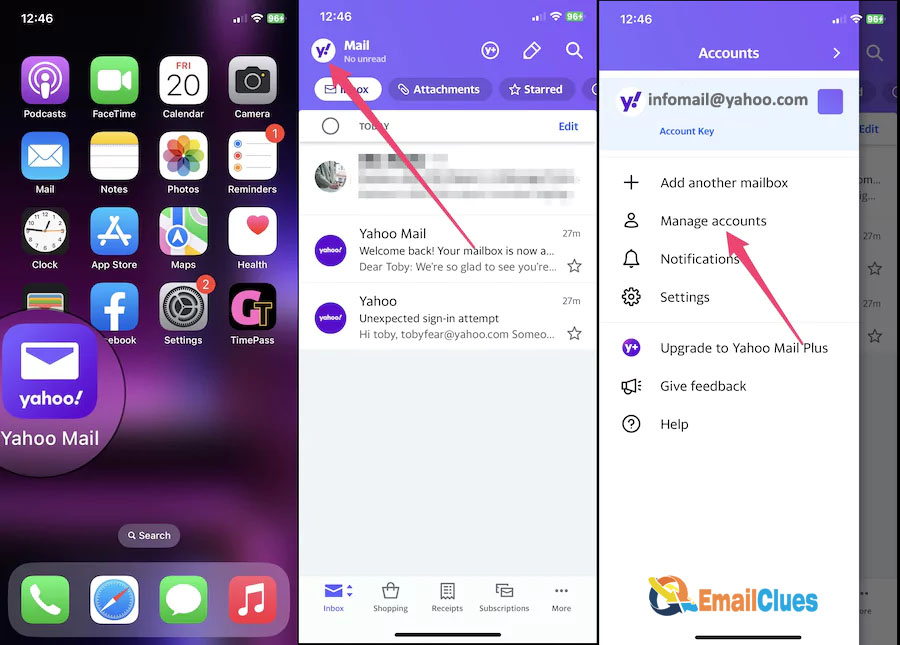
3)Select accounts
4)Select add account
5)Choose yahoo
6)enter the yahoo mail address
7)Choose next
8)Enter the passward associated with the yahoo mail
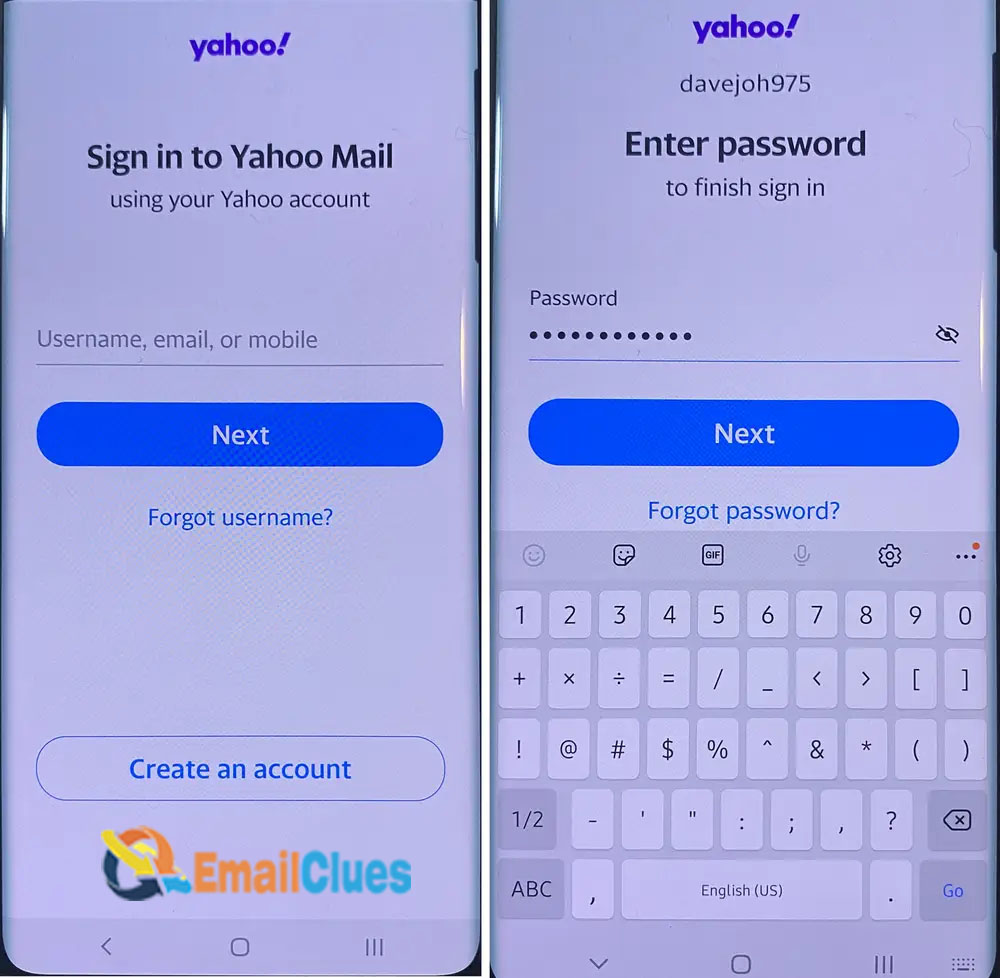
9)Tap on “sign in” option
10)Turn on the mail toggle switch
11)Turn on all those option you want to sync
12)Click on “Save”
Steps to set up Smtp:
1)Go to settings option in your device
2)Select Mail
3)Choose contacts
4)Click on calendars
5)Choose the email account from which you want to send messages.Add a new email if its not there in the list.
6)Click on “SMTP” under the option “Outgoing mail server”
7)Click “Add server”
A window with various options appears on the screen
Host name should have your SMTP’S server name
Make sure that your server is turned on

The username option should contain that email which is used for sending mails.
Enter your passward in the passward option under authentication section.
The by default server port is 25.
Select “done”
After performing all these steps,you can successfully send your emails.
What to do if your mail is not working after OS upgrade?
Check to determine whether your Mail app is in the appropriate location on your iphone or if it was mistakenly destroyed during the upgrade process if you recently updated your OS. Begin by launching your devuve Mail programme from within your applications, as seen below:
1. Launch Finder.
2. Navigate to Applications and look for the Mail app; if it isn’t there, your app isn’t working.
3. Use the Spotlight feature on your device to quickly locate the software.
4. Press the Command-Space bar or the Spotlight key, or click the Spotlight symbol in the menu bar (if available in the row of function keys on the keyboard).
Mail Crashing
When the deviceOS system appears to be on the fritz, several users have complained that the Mail software on the device regularly crashes or runs slowly.
Because this problem may necessitate a little more troubleshooting than usual, we’ve come up with three methods to help you solve this problem.
Solution:
Force Close the Mail App.
- Choose “Quit” from the app’s menu in the menu bar, or press Command + Q, to quit or close a device app normally.
- If the app does not quit, hit Option+Command+Esc (Escape) at the same time to force the app to quit.
- Then, in the Force Quit window, select the app and click Force Quit.
4. If the Finder becomes unresponsive, you can even force it to shut down: In the Force Quit window, select Finder, then click Relaunch.
What to do when emails are not being received by device mail?
Nothing screams “strange” like an inbox that is empty.
If your inbox is normally bustling, it’s a sign that your device Mail programme isn’t getting your regular dosage of emails.
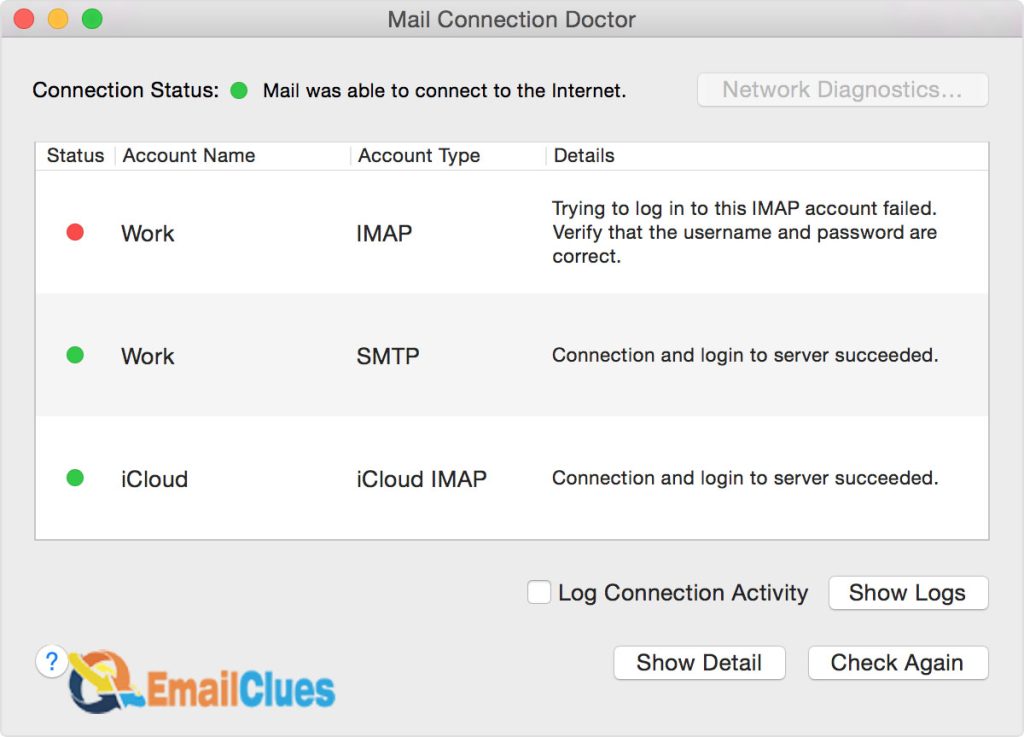
We’ve discovered a solution that can assist you. However, before you begin, check your Connection Doctor to see if there are any issues that are keeping your Mail app from getting emails.
Solution:
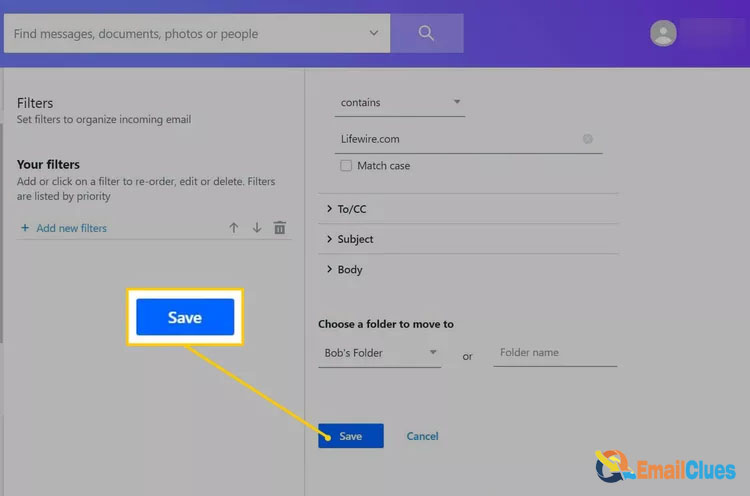
Filters and Blocked Messages should be checked.
In our Mail app, we may create filters that filter or prohibit messages from appearing in our inbox without our knowledge.
Follow these procedures to see if your custom filters are blocking you from getting emails:
- Check to see if you have any filters enabled, as device only allows filters to be applied in the current Mail window.
2. Whether you’re not sure which filter is hurting your inbox, turn it off and restart the app to see if it fills up. To disable your device Mail app’s filter, do the following:
Choose View > Filter > Disable Message Filter in the Mail app on your device, or click the Filter button at the top of the message list.
You can also select Disable Message Filter from the menu that appears by pressing and holding the Filter button.
3.You may also turn on your filters one at a time to examine which ones are affecting your Mail app and delete or alter their filter settings. To activate your device Mail app’s filter, do the following:
Select View > Filter > Enable Message Filter in the Mail software on your device, or click the Filter button at the top of the message list.
You may also select Enable Message Filter from the menu that appears by pressing and holding the Filter button.
If maybe your filters aren’t the problem, check to see if you’ve blocked any senders in your Mail app, then unblock them with these two simple steps:
1.Select a message from the sender you’d like to unblock in the Mail app on your device.
2In the message header, move the pointer next to their name, click the arrow, and then select Unblock Contact.
device Messages Aren’t Sending
You can’t afford to have emails stuck in your device’s outbox if you rely on your inbox to get work done.
Check to see if your internet connection is stable or if you’ve mistakenly switched to aeroplane mode before you start debugging (yes, that happens). If you still can’t send a message from your Mail app after doing so, try the method below:
Examine the Mail Server
If you’re experiencing trouble sending emails, taking a check at your mail server can be a good place to start.
When your Mail server is causing problems with your Mail app, it will sometimes send you an alert and sometimes it won’t. As a result, you’ll need to check to ensure if the Mail server is set up correctly.
- Check to see if the one on your device is up to date.
- . Select Mail > Preferences from the drop-down menu.
3. your account, then go to Server Settings > Edit SMTP Server List.
4. to see if the server information matches what you expected. If it doesn’t, you’ll need to get in touch with your email provider.
5. yourself a message to test out any changes you made.
What to do if device mail continues to crash?
Even after you’ve updated and rebooted your computer, does your Mail app continue to crash on you?
Despite your best attempts to maintain your device OS up with the newest, the system may no longer recognise you, or you may need to remove a problematic file.
Whatever the case may be, we have the solutions to solve your Mail app when it crashes.
Delete Unwanted Email Attachments
Your Mail app may crash as a result of a faulty Mail attachment.
However, if you get plenty of attachments or have a lot of emails, it can be difficult to figure out which file is causing the problem.
The best bet is to eliminate the most newest attachments or the largest attachments you’ve received so far.
Mail folder lost
Nothing is more irritating than trying to locate a folder in device Mail only to discover that it has vanished or is no longer accessible.
This occurs in the app from time to time and can be resolved by following these steps:
Examine your email settings.
1. Go to the Mail app on your device and open it.
2.Select “Connection Doctor” from the “Window” menu in the top menu. If there are any issues connecting to the Mail app, this will show up here.
3.Reset this by checking account settings and deleting and re-adding your Mail account. Your Mail app folder and all of your emails should be available again after that.