How to Add Gmail into MS Outlook and Configuration Guide

Although it’s daunting for Gmail Setup with Outlook for beginners, there’s no need to panic. Microsoft Outlook is an excellent email client for organizing your emails. Here are the Steps to set up Mail with Outlook.
Gmail Setup with Outlook
Configuring Gmail with Outlook is one of the best ways to access multiple email accounts easily. Here are some advantages of using Gmail in Outlook.
- Organize the messages and emails easily.
- Ease to work even in Offline Mode.
- Manage Multiple Accounts with a hassle-free experience.
Steps for Gmail Setup with Outlook
To set up Gmail with Outlook, you must follow these steps. Here’s the Outlook Configuration process from Gmail.
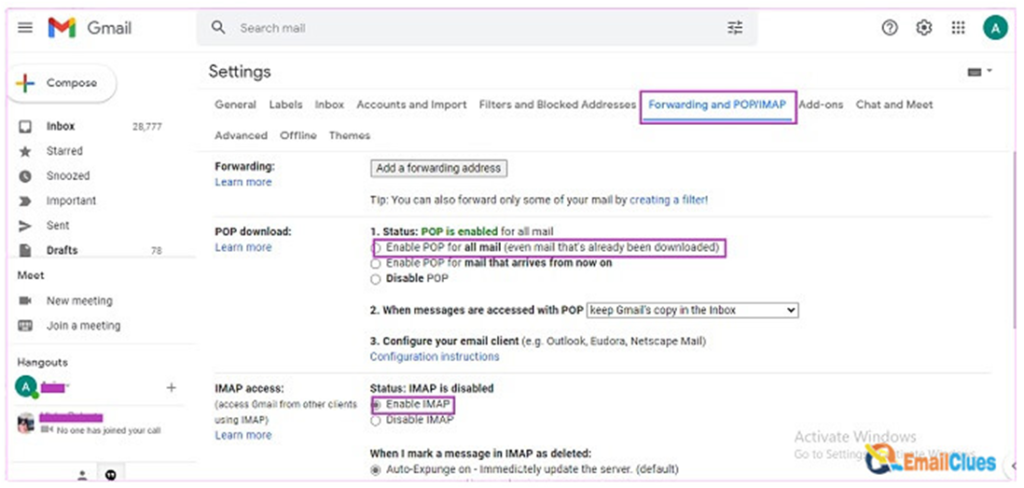
Step I – Enable POP/IMAP
On the Steps to Setup Mail, you must enable the IMAP Settings. Here’s how,
- Go to the Gmail Account Settings.
- Click on All Settings>Forwarding POP/IMAP there. It will open the POP/IMAP Settings.
- Now click on Enable IMAP option.
- At last, click on Save Changes.
Step II – Add an Account in Microsoft Outlook
- Open the Outlook Program in your Windows and click on the File.
- Click on the Add Account shown in the Account Settings.
- Click on the Manual Setup or additional server types option and click on Next.
- Now select the option POP or IMAP, and click Next.
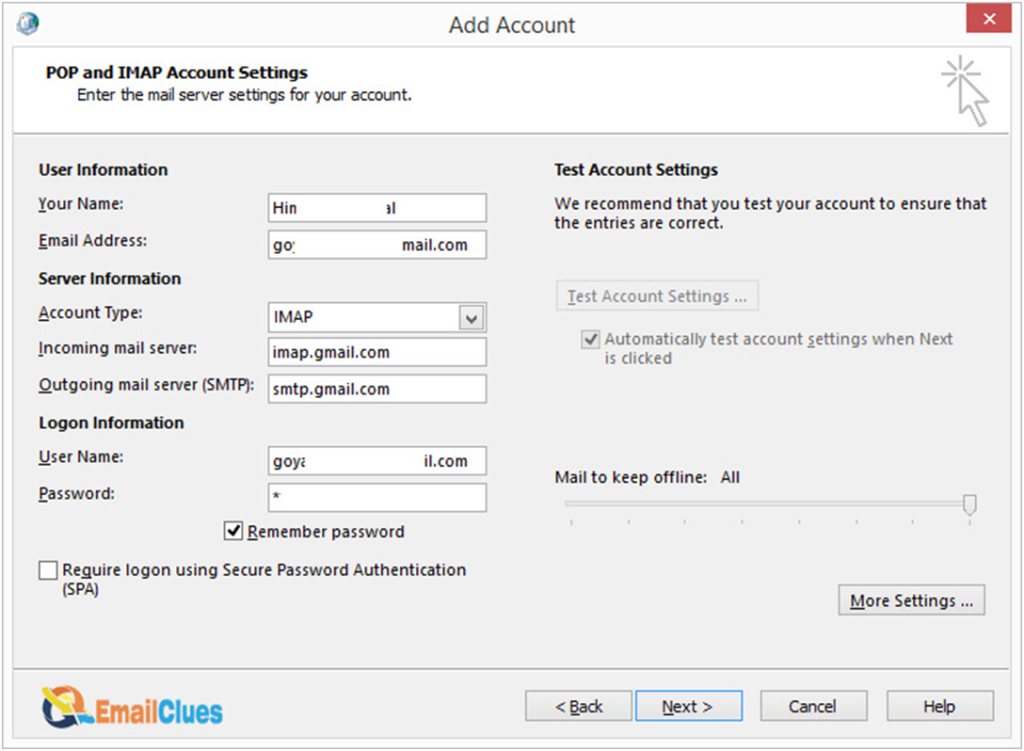
Step III – Configure Details for IMAP Account
After choosing POP or IMAP, you need to add the details for IMAP Account. You need to configure the details carefully here,
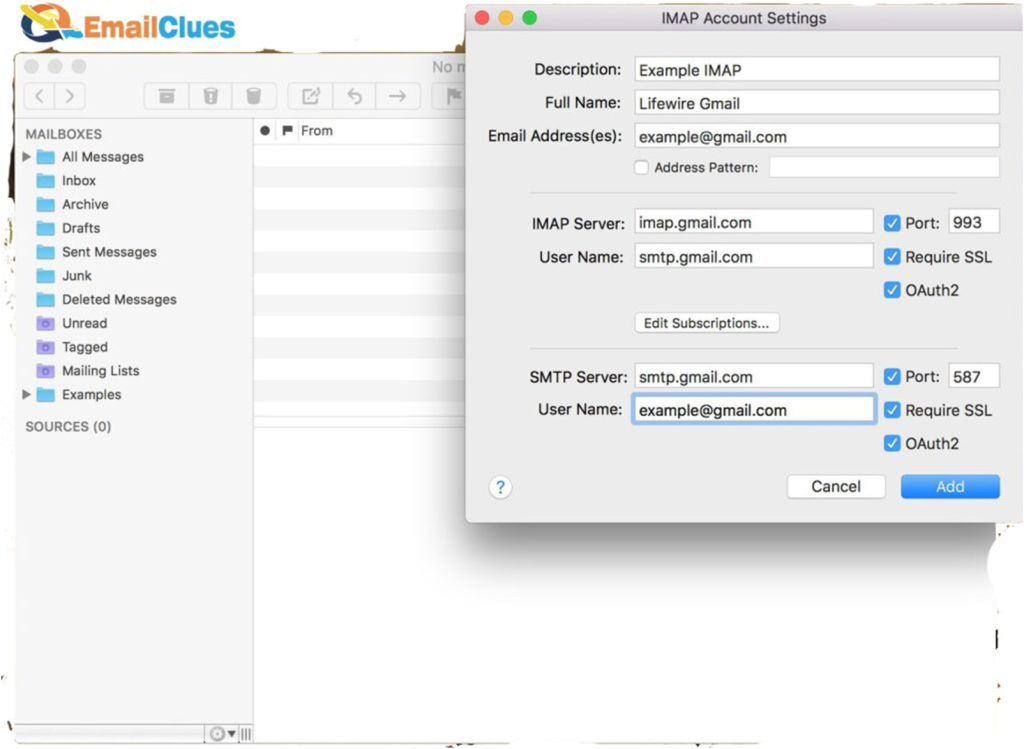
Your Name: The Name which you want to add
Email Address: your email address.
Account Type: Choose the Account Type as IMAP.
Incoming mail server: imap.gmail.com
Outgoing Mail Server (SMTP): smtp.gmail.com
User Name: set the username here. You can leave your mail address as it is for the username.
Password: Set the strong password here.
After entering all the details, you can check on Remember Password there.
Step IV – Set Internet Email Settings
After filing the details of the IMAP Account in step IV, you need to click on More Settings. It will open the Internet Email Settings.
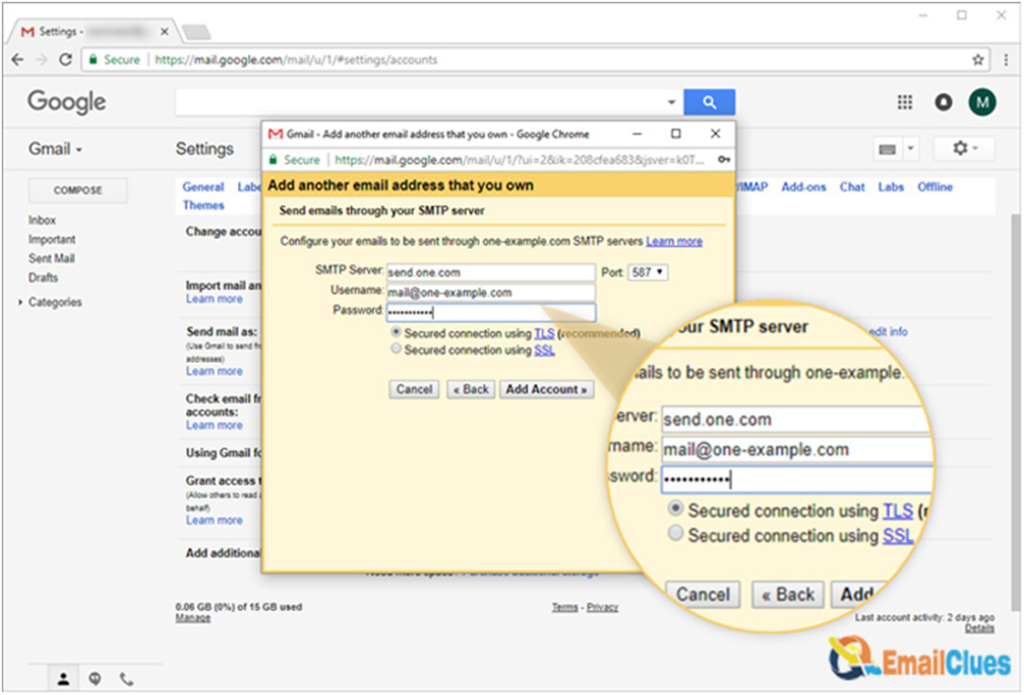
- Go to the Outgoing Server tab and check on My outgoing Server (SMTP) requires authentication.
- Also, check on using the same settings as my incoming mail server, and click OK.
Now go to the Advanced tab and configure the details carefully,
Set Incoming Server (IMAP) to 993 or 143
Set Incoming Server encrypted connection to SSL/TLS.
Outgoing Server (SMTP) to 465 or 587
Outgoing Server encrypted connection to SSL/TLS.
- After all, leave all the settings as it is and click on OK. Finally, you are all set. You are done if you have configured the settings correctly regarding the outgoing and incoming Servers.
- It will open the Test Account Settings to configure you are all set. So click on Close. Then click on Finish.
Outlook configuration Process
If you have set up an Email address in the control panel, you can configure this account in your Outlook. For configuring your Email following are the instructions.
- Email account administration.
- Automatic configuration
- Manual configuration
- Choosing the account type: POP3 or IMAP
Email account administration
Click File at the top left and then<add account>.
Automatic configuration
Enter a name for your account( this name is shown in the account list) and the sender name that recipients of your Emails will see.
Enter the full email address and then the password below.
Clicking Net automatically searches for the correct account settings.
Manual and automatic process to Setup
To Setup up the email addresses yourself, go to Manual Setup or additional server types> and then click, Next.
5 methods to Fix Outlook Configuration Problem
No matter how well written, there will always be the outlook problem that seems to stay and may not be related to add-ins at all. These are the five methods to fix Outlook.
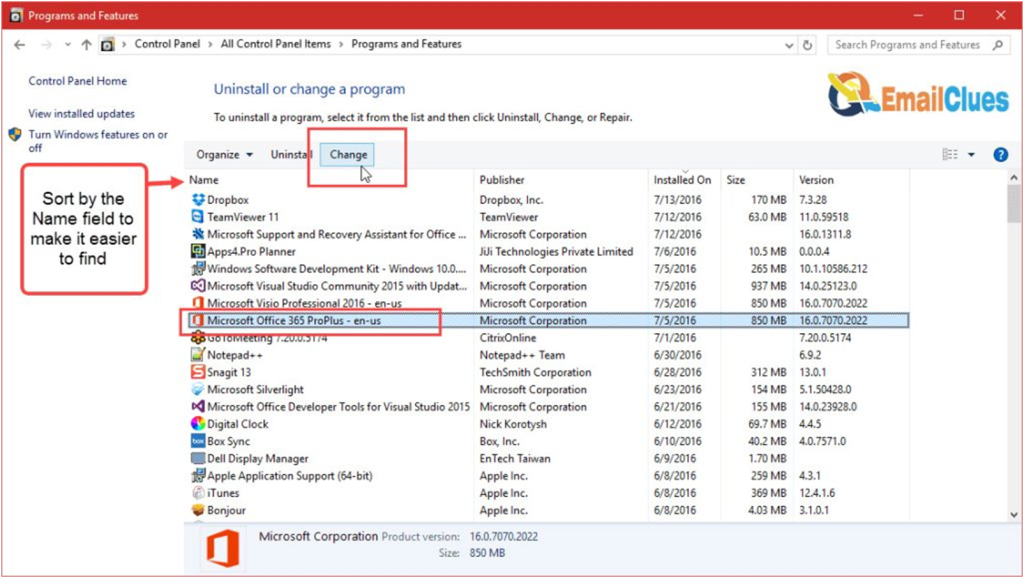
The method I – Uninstall or Change Program
- Go to the App Settings.
- Find the Office 365 or Microsoft Office Professional from the Programs and Features.
- Right-click and choose Uninstall or Change option.
- Click on Change, then select Repair.
- Click on Continue.
- Follow the on-screen instructions.
Method II – Uninstall the Older Version of Outlook
If you are using an older version of the office package, then you may sometimes need help with this. So to fix Setup Cannot Continue because Outlook isn’t configured to have a Default Profile error, you need to install the newer version of office.
- Go to the Programs and Features>Uninstall or Change Programs.
- Find Miscorofost Office Package there.
- Right-click and then click on the Uninstall option.
- Follow the On-Screen steps to uninstall.
- Re-start the computer.
Method III – Run the Microfost Support and Recovery Assistant
If you are using an Enterprise Version of Windows, it’s a great idea to fix the Outlook Configuration Problem. For this, you can use Microsoft and Recovery Assistant.
Method IV – Run a PowerShell Commands
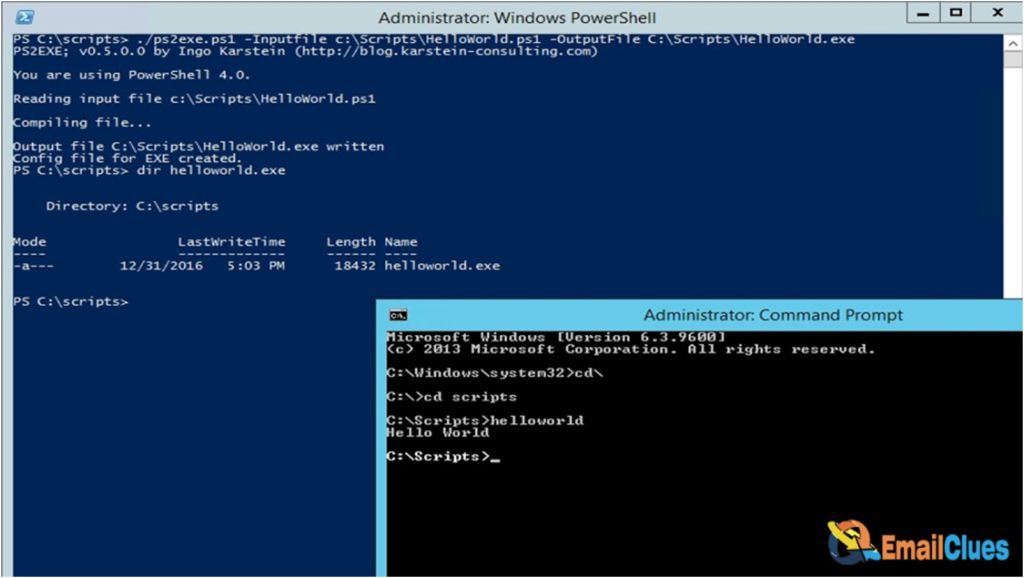
Open the PowerShell. For shortcut type, Windows + S key.
Click on Run as Administrator.
Now give the following command,
Get-AppxProvisionedPackage -Online | where-object {$_.packagename –like “*Outlook*”} | Remove-AppxProvisionedPackage –Online
Get-AppxPackage “*Outlook*” | Remove-AppxPackage
After that, close the PowerShell window.
- Now again, open the PowerShell without administrator.
- Then give the following command,
Get-AppxPackage “*Outlook*” | Remove-AppxPackage
Now re-start the computer and try Gmail Setup with Outlook.
Method V – Try Installing the Newer Version of iCloud
Installing the newer version of iCloud will help to synchronize the problems. So, install the latest version of iCloud and try again.