Setup Domain Mail into Gmail App Manually: Step-by-Step Guide
If you are a Gmail user, you must first set up domain email accounts in your inbox. You can use Gmail’s mail fetcher feature to do this. This way, emails sent to your domain email will show up in your Gmail app. Here’s the step-by-step guide to Setup Domain Mail in Gmail App.
Methods to Setup Domain Maile in Gmail App
To make the mailing address professional and as same as your domain name, we have two major methods. You can set up the SMTP Settings for Gmail access. They are,
Free Method offered by Email Hosting
Premium Method by Google Workspace
Things to be Considered to Setup Domain Mail Steps
Before you start, you have to make sure you got these things in order
u Domain name
u Domain Email Address
u Email Hosting offered by Hosting Company
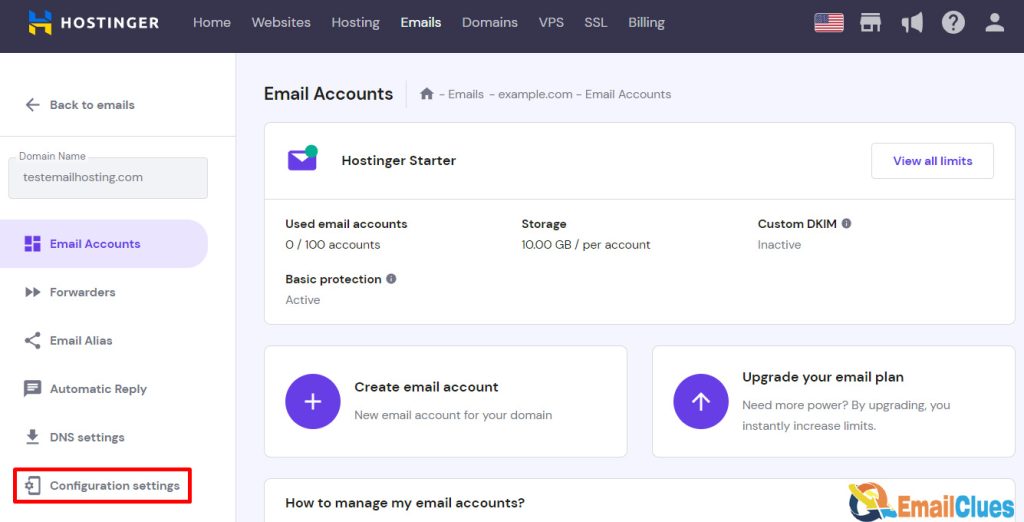
u Email client configuration settings. You can find all the settings information here.
u Gmail account. If you don’t have one, you can create one.
Setup Domain Mail into Gmail App Manually: Step-by-Step Guide
Step I – Create a Gmail Account
First, you need to have a Gmail account with you. So, you must create a new or existing Gmail account. All the free Gmail Account contains the @gmail.com extension.
Step II – Create a Custom Email Address
Now, if you are using the hosting services of any hosting company, then it offers the features of Email Hosting. With these features, you can easily create a custom email address for your site.
The format of Email hosting lookslike anything @ yoursite.com, means. It looks like [email protected].
Depending on your Hosting company, you can create a custom email within a few minutes. To create a custom Email address to set up domain mail in the Gmail app, you can go to the Email & Office options from the login or admin panel /cPanel of your hosting.
Step III – Allow Gmail to Import Email using POP3/ Set Incoming/outgoing port.
After creating a custom email address from the Email Hosting or Hosting Panel, you need to connect both. For this, you need to use the POP3 Settings. With this, you can connect Gmail and Email in a single chain
.
After that, follow these steps,
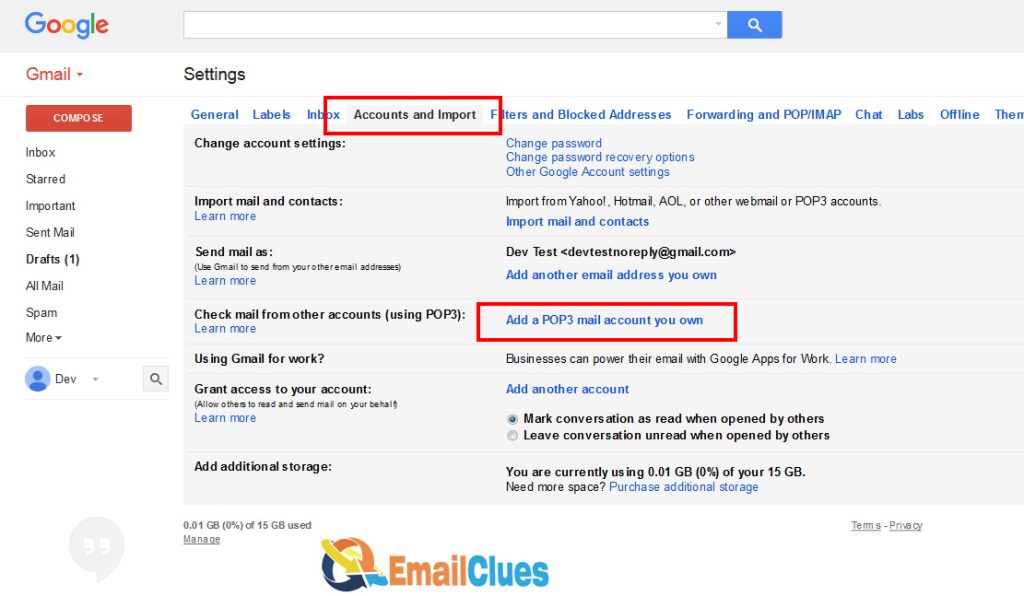
Go to your Gmail and click on Settings.
Click on See all Settings.
Go to Accounts and Import>Check mail from other accounts.
Now click on Add a mail account. It will open the pop-up on your Windows screen.
Now enter your custom email address. The mail address you have created in Step II is your custom email address.
Click on the import emails from my other account (POP3).
After that, you need to fill up the following details there,
Username: You can set the custom username for the mail. You can keep the username as same as the mail address characters before @. If your email address is miuisupport @ gmail.com you can set the username as miuisupport.
Password: Here, the password must be the same as you set while creating the email address in Step II.
POP Server & Port: You can set the POP Server and Port Details as mentioned in the email hosting. For that, you have to go to the Email Hosting Dashboard or contact the hosting company’s support.
After these, click on Leave a copy & Always use a secure connection icon to check/mark it.
At last, recheck all the inputs and click on Add Account.
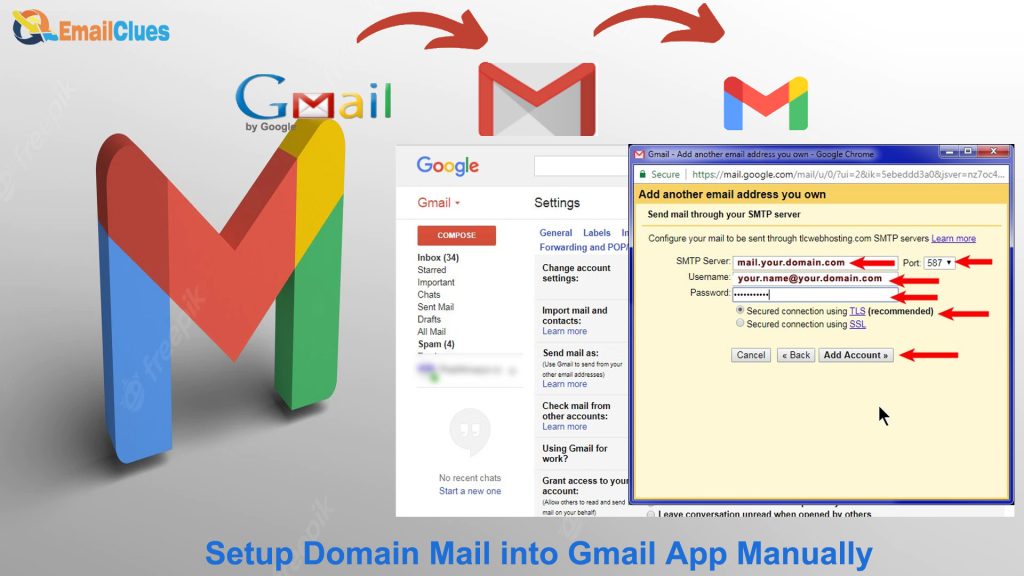
Step – IV Configure Gmail using SMTP Settings.
After Importing Emails using POP3 Settings, you also need to allow Gmail to Send Mails. For this, you need to set up the SMTP Settings Information. Here’s how,
Go to the Gmail Account Settings and click on Accounts and Import.
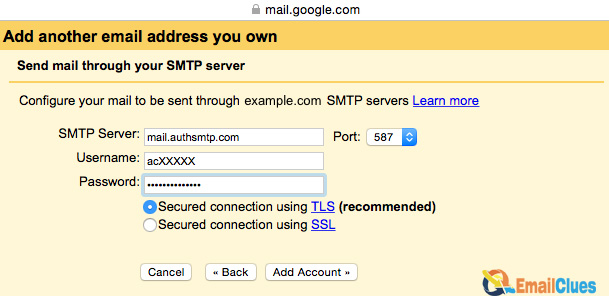
Choose to Send mail as>Add another email. It will open the Pop-up window.
Now Enter the name (username or your name) and custom domain email address you created in Step II.
Then check the Treat as an alias.
Enter the SMTP Information as mentioned in the email host. Go to the Email Host to find the SMTP Information.
SMTP Server & Port: Copy the details mentioned in the email hosting.
Username: Set the username here. You can keep the username as same as the mail address characters before @. If your email address is [email protected], you can set a username like miuisupport.
Password: Here, the password must be the same as you set while creating the email address in Step II.
After that, click/choose the Secure connection method as the recommendations by Gmail.
Click on Add Account. Gmail will send you a code to your custom email address/domain email account for confirmation.
Now enter the Confirmation code there and click on Confirm.
After this process, you can receive emails directly from your Gmail account.
Step V – Testing and Finalizing
After the successful setup, set up domain mail in the Gmail app; you need to test it once. For this, you can send the mail from another Gmail or Email account to your new custom domain mail into the Gmail app for free.
Step VI – Set it as Default (Optional)
Go to the Settings of your Gmail and then the Accounts tab.
Find Send Mail As an option there.
Click on make default.
That’s it.
Setup Domain Mail Steps by Google Workspace
Setting up Domain Mail in Gmail App by G Suite is another best method for you. With Google Workspace, you can create a custom email with complete access to your Gmail Account. You can also get access to Drive, Docs, Sheets and others.
Step I – Create a Google Workspace account.
After subscribing to the plans, you need to set up the account with the basic details. Fill out your custom domain details there.
Step II – Verify the Domain Name
To Verify your domain with Google Workspace, you need to configure the TXT Settings.
TXT settings are the type of domain name system(DNS). It contains text information for sources outside of your domain. You have to add these records in the domain settings.
Depending upon the Domain register, the TXT Records are different. For this, you can get in touch with the registrar.
When you set up your google workspace or cloud account, google gives you a record to add to your domain settings. After the record is added, your domain ownership is confirmed.
Step III – Add the MX Records
Now to manage the Email of your domain name, you must need to add the MX Records. Like the TXT Settings, you can add the MX Records for Email. You can add the MX Records from the Dashboard of Register.